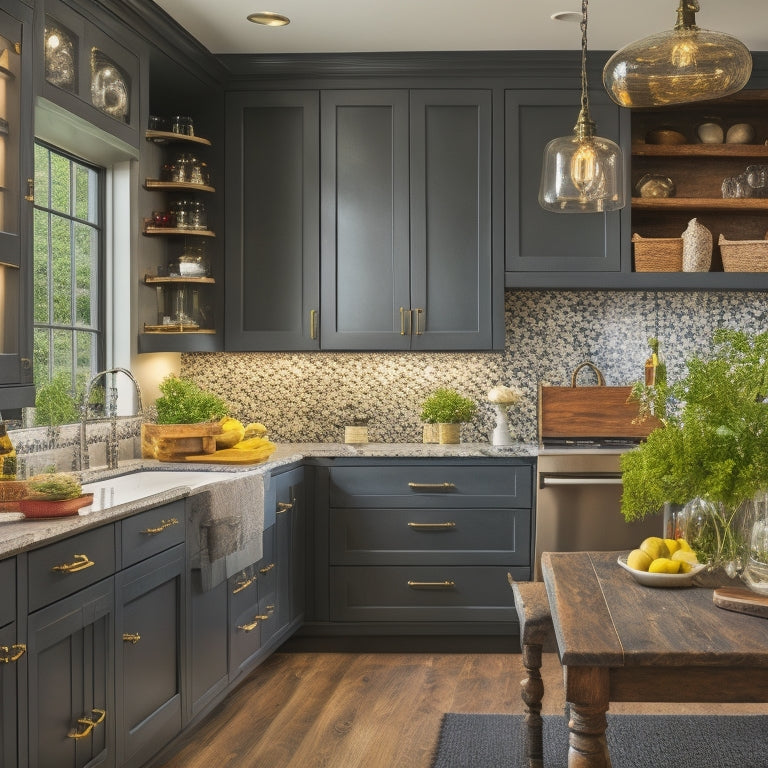
Transform Your Kitchen With Stylish DIY Hutch
I'm excited to transform my kitchen with a stylish DIY hutch that's both functional and beautiful. To get started, I'll consider space limitations and decide on the perfect hutch style, weighing pros and cons of countertop vs. floor models. Precise measurements and material selection are essential, and I'll opt for durable birch plywood and pre-made cabinet doors. With a solid plan in place, I'll construct the frame, attach bead-board backing, and add finishing touches like paint, hardware, and decorative accents. Now, I just need to bring it all together – and with these steps, I'll be on my way to a kitchen that's both stylish and functional, with plenty of surprises waiting to be uncovered.
Key Takeaways
• Plan your kitchen hutch by considering space limitations, functionality, and style to ensure a comfortable fit in your available space.
• Measure your kitchen space precisely to determine the ideal size and layout for your DIY hutch project.
• Build a sturdy hutch frame using three-quarter-inch birch plywood and precise cutting and assembly techniques.
• Add a professional finish to your hutch with a paint sprayer, Sherwin Williams paint, and decorative accents like molding or corbels.
• Install your DIY hutch securely by locating wall studs, using wall anchors, and drilling pilot holes to prevent damage.
Planning Your Kitchen Hutch
As I begin planning my kitchen hutch, I consider the type of hutch that will best fit my kitchen's unique needs, taking into account the space limitations and whether I want it to be functional, decorative, or a combination of both.
Design considerations are essential, as I weigh the pros and cons of a countertop versus floor hutch. Space limitations play a significant role in this decision, as I need to make sure the hutch fits comfortably in the available space.
Next, I decide whether I want my hutch to be functional, providing ample storage, or decorative, adding a touch of elegance to the room. I also ponder the door style - glass for a sleek look or solid for concealed storage.
Measuring and Material Selection
With my design plan in place, I turn my attention to measuring my kitchen space to guarantee a precise fit for my hutch. I take careful note of the height, width, and depth, considering cabinet door width and placement to ensure seamless integration.
Selecting the right wood is essential, and I opt for three-quarter-inch birch plywood for its durability and aesthetic appeal. I'll also purchase pre-made cabinet doors and drawers for convenience.
Proper measurements are key to avoiding costly mistakes, so I double-check my calculations before making my final material selection. With my materials in hand, I'm ready to bring my design to life.
Building the Hutch Frame
I grab my trusty nail gun and screwdriver, ready to construct the hutch frame, the foundation upon which my DIY modern kitchen hutch will take shape.
With my frame layout and design in mind, I begin building the frame using three-quarter-inch birch plywood. I carefully measure and cut each piece, ensuring a sturdy and precise fit. My wood selection is vital, and I'm confident in my choice of birch plywood for its durability and aesthetic appeal.
As I assemble the frame, I use my tools with precision, making sure each joint is secure and aligned. With the frame taking shape, I can already envision the final product – a stylish and functional kitchen hutch that will elevate my kitchen's storage and style.
Assembling and Finishing Touches
My hutch frame is now ready to receive the bead-board backing and face frame, which will add depth and visual interest to the overall design. I'll attach the bead-board using a nail gun, ensuring a secure fit.
Next, I'll focus on painting techniques, using my trusty paint sprayer to achieve a smooth, even finish with Sherwin Williams paint. I'll also select the perfect hardware, considering factors like functionality and style.
To take my hutch to the next level, I'll add decorative accents, such as molding or corbels, and explore lighting options, like under-cabinet lighting or pendant lights.
With these finishing touches, my DIY hutch will be transformed into a stunning, one-of-a-kind piece that showcases my personal style.
Installing and Showcasing
Sturdily fastening the hutch to the wall is essential to secure stability and prevent it from tipping over, so I'll start by locating the wall studs and marking their positions.
To secure a stable installation, I'll follow these installing tips:
- Use wall anchors to evenly distribute the weight
- Drill pilot holes to prevent wall or hutch damage
- Tighten screws securely to avoid any movement
- Check the hutch's level to confirm it's perfectly straight
- Add decorative trim to hide any gaps or imperfections
Now that my hutch is firmly in place, it's time to showcase my styling ideas. I'll incorporate some decorative accessories, such as vintage dishes or greenery, to create a visually attractive display.
With these final touches, my DIY kitchen hutch transformation is complete, and I couldn't be more pleased with the outcome!
Frequently Asked Questions
How Do I Adjust the Hutch Design to Fit Around Plumbing or Electrical Outlets?
As I navigate the puzzle of my kitchen's plumbing and electrical outlets, I creatively customize dimensions to conceal fixtures, adapting my design with clever solutions that harmoniously integrate around these obstacles, ensuring a seamless fit.
Can I Use MDF or Other Materials Instead of Birch Plywood for Construction?
'I opt for birch plywood, but I can consider MDF alternatives or other materials, factoring in durability and wood finishes, to guarantee my DIY hutch construction meets my design and functionality needs.'
What Is the Recommended Thickness for the Shelves in the Kitchen Hutch?
The irony - I'm building a strong kitchen hutch, yet I'm worried about shelf durability! For best space maximization, I recommend 3/4-inch thick shelves to guarantee stability and support for heavy kitchen essentials.
How Do I Ensure the Hutch Is Level and Secure on Uneven Flooring?
'I verify my hutch is level and secure on uneven flooring by carefully placing shims for stability and using floor leveling tools to guarantee safety, giving me peace of mind and a sturdy foundation.'
Can I Add Electrical Outlets or Lighting Inside the Kitchen Hutch Design?
As I envision my kitchen hutch, I imagine warm lighting illuminating my favorite cookbooks, and convenient outlets charging my devices; to make it a reality, I'll carefully plan outlet placement, choose suitable lighting options, and guarantee electrical safety through design customization.
Related Posts
-
Revamp Your Space: Decluttering Made Easy
You're about to discover a simple, structured approach to decluttering that breaks down the overwhelming task of reva...
